• Home
    • Patterns
    • Artist Quilts
    • FREE RESOURCES
    • Free Templates
    • New Blog
    • Older Blog
    • All
    • Simply Cozy
    • Still More Paper
    • Olive You
    • Shimmer
    • Flirtation
    • Bluish
    • Think Ink
    • Filigree
    • Lazy Afternoon
    • Frisky
    • Celestial
    • Even More Paper
    • Sew Happy
    • Dance in Paris
    • Quotation
    • Chill
    • Just Red
    • Breeze
    • Day in Paris
    • More Paper
    • Spotted
    • White Christmas
    • Colorbox
    • Fragile
    • True Blue
    • Luster
    • Hey Dot
    • Flow
    • Paper and Ink
    • For You
    • Reel Time
    • Figures
    • Sphere
    • Barcelona
    • Comma
    • Juggling Summer
    • About
    • Contact
    • Stockists
    • Wholesale Info
    • Fragment QAL
    • Those Trees QAL
    • Dots On Point QAL
    • Pluses QAL
    • Spring in Paris QAL
    • Modern Building Blocks
    • Zen Chic Inspired
    • Online Classes
    • Quilt Maker Academy
    • Mega Star - Online Class
    • Fly With Me - Online Class
    • Quilt The World - Globe
    • Curved Seams - Incredibly easy
    • EVENTS
  • Newsletter
Menu

Zen Chic - modern fabrics and quilt patterns

17 Schlingweg
Werther (Westfalen), NRW, 33824
Phone Number
Zen Chic creates modern, sophisticated quilt fabrics and patterns and quilts

Your Custom Text Here

Zen Chic - modern fabrics and quilt patterns

  • Home
  • Shop
    • Patterns
    • Artist Quilts
    • FREE RESOURCES
    • Free Templates
  • Blog
    • New Blog
    • Older Blog
  • Fabrics
    • All
    • Simply Cozy
    • Still More Paper
    • Olive You
    • Shimmer
    • Flirtation
    • Bluish
    • Think Ink
    • Filigree
    • Lazy Afternoon
    • Frisky
    • Celestial
    • Even More Paper
    • Sew Happy
    • Dance in Paris
    • Quotation
    • Chill
    • Just Red
    • Breeze
    • Day in Paris
    • More Paper
    • Spotted
    • White Christmas
    • Colorbox
    • Fragile
    • True Blue
    • Luster
    • Hey Dot
    • Flow
    • Paper and Ink
    • For You
    • Reel Time
    • Figures
    • Sphere
    • Barcelona
    • Comma
    • Juggling Summer
  • Info
    • About
    • Contact
    • Stockists
    • Wholesale Info
  • QAL
    • Fragment QAL
    • Those Trees QAL
    • Dots On Point QAL
    • Pluses QAL
    • Spring in Paris QAL
  • Books
    • Modern Building Blocks
    • Zen Chic Inspired
  • Classes
    • Online Classes
    • Quilt Maker Academy
    • Mega Star - Online Class
    • Fly With Me - Online Class
    • Quilt The World - Globe
    • Curved Seams - Incredibly easy
    • EVENTS
  • Newsletter

3 Methods for Sewing a Professional Binding and Pluses Quilt Along Week 6

September 14, 2022 Brigitte Heitland

Our 3 best methods for binding your quilt professionally. Watch the video and learn how binding a quilt can easily be done and look beautifully.

3 Methods for Sewing a Professional Binding

Binding a quilt is the final step in completing your project. It helps finish off a quilt nicely, but it can also be tricky to get right. If you're not sure how to sew the binding onto a quilt, don't worry! There are several different methods that will help you end up with professional results. In this blog post, we'll break down three different ways for sewing binding onto your projects so that you can choose what works best for your next project!

Method 1 - Binding by machine, Stitch in the Ditch

The first method is sewing your binding on the quilt by machine. This method is best for when you want a quick result for casual use.

Pros: Quick and efficient

Cons: You can't exactly control how the topstitching on the backside of your quilt will sit on your binding. It may turn out as a bit irregular, not always parallel, and with the same distance to your binding edge (which would be totally ok for a casual quilt)

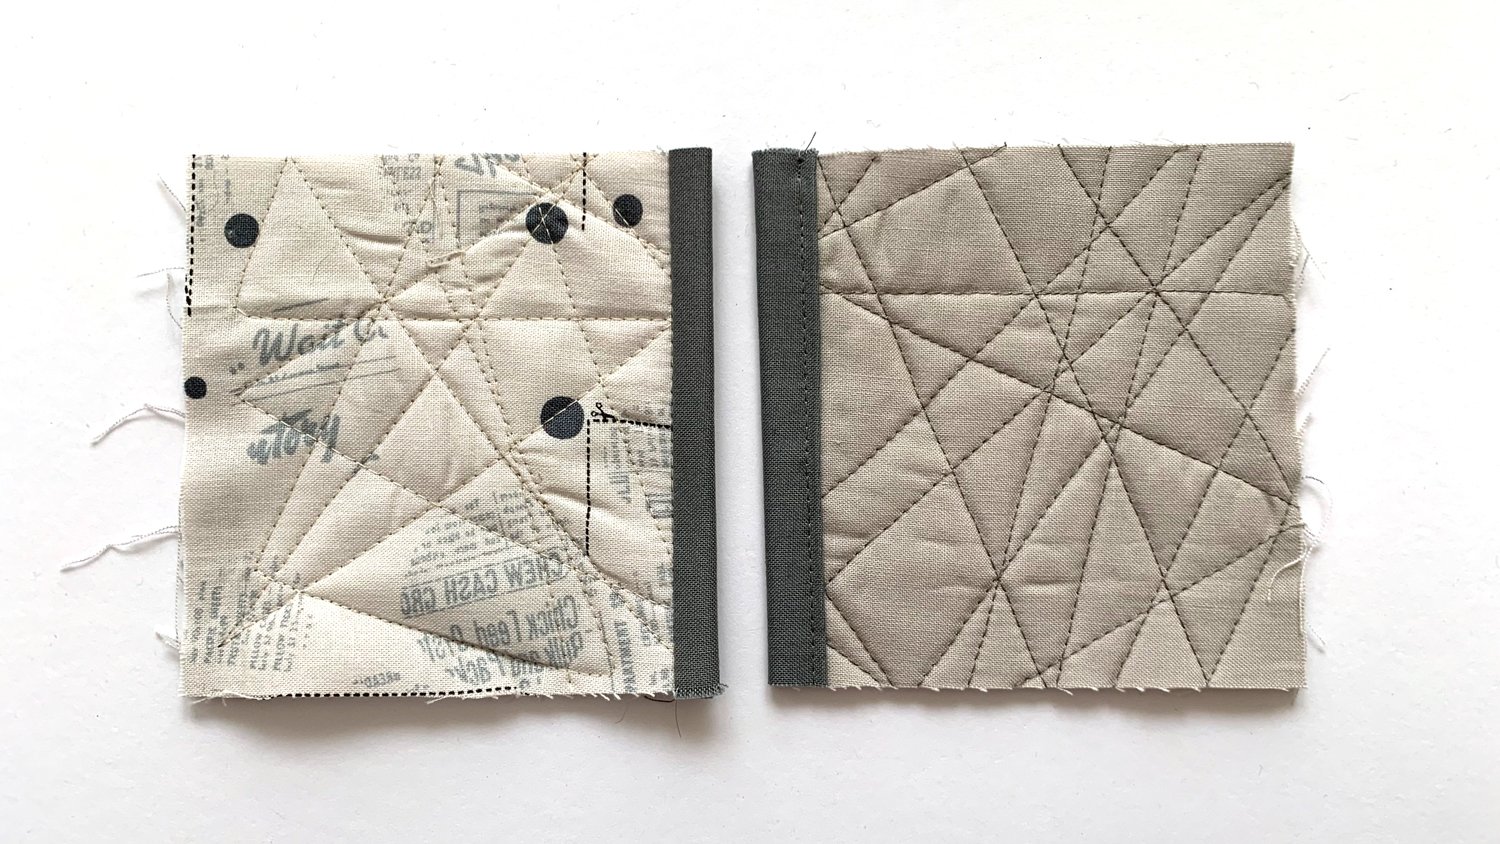
Binding Method 1: Stitch in the Ditch, Front and Backside

Method 2 - Binding by machine, Decorative Stitch

The second method is to use a decorative stitch to bind your quilt. The advantage is that your front and backside look equally good.

To decide which decorative stitch will work best for you, check which stitches your machine offers. A simple zigzag, which nearly every machine offers will do the job.

Pros: Is faster than hand-binding while looking equally good on the front and backside

Cons: The binding gets a bit stiffer and flatter snd it is just a bit unconventional

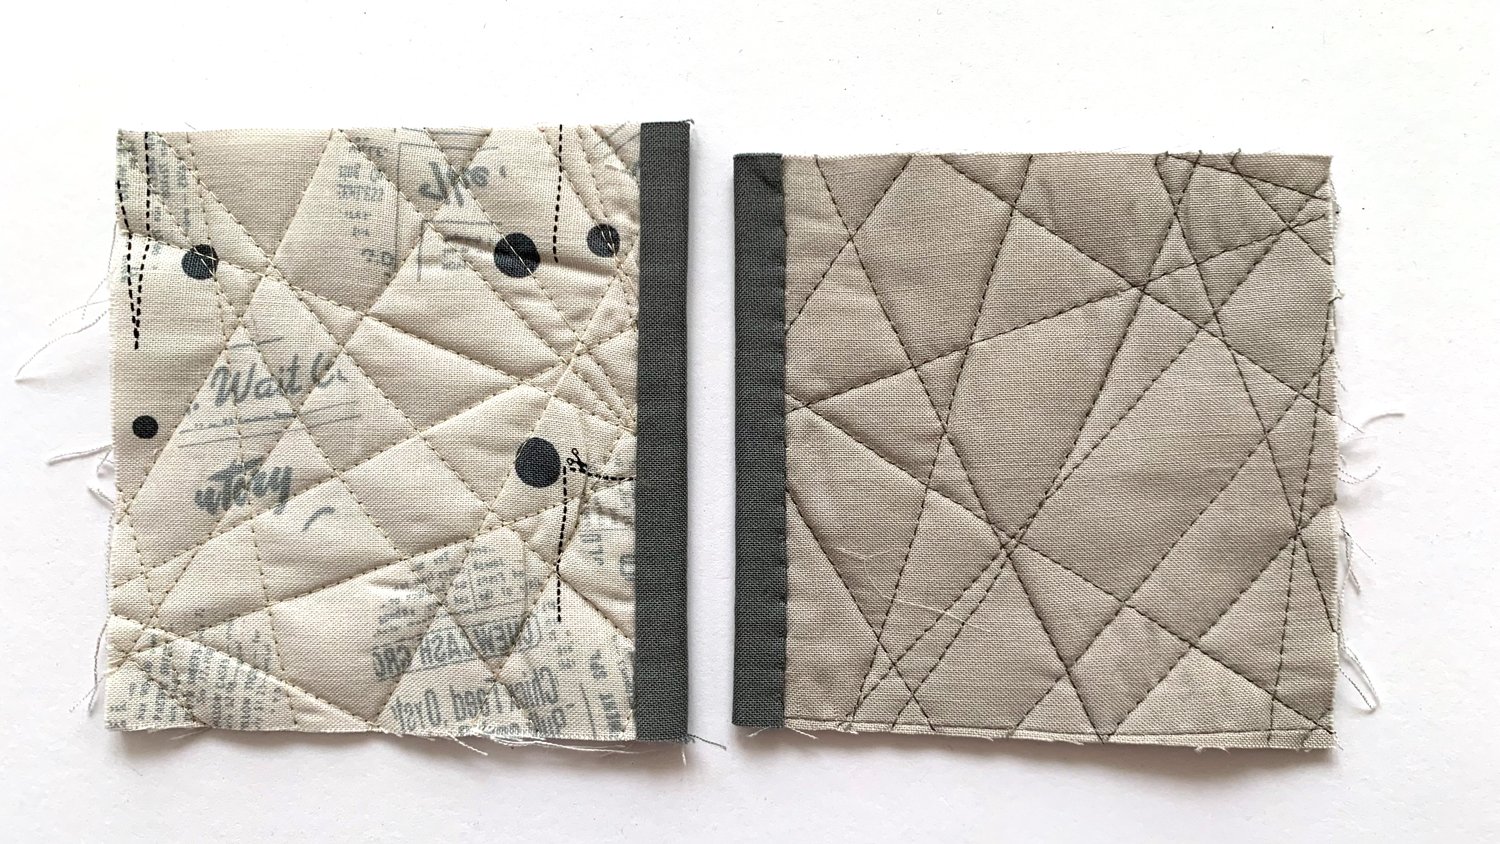
Binding Method 2: Decorative Stitch, Front and Backside

Method 3 - Binding by hand

If you don't mind taking the time to do it, hand binding is my preferred method. The nearly invisible stitches are a labor of love and when they're done well they can be quite beautiful.

It's also a fun way to spend time, listening to an audiobook while stitching is really enjoyable for me. You can get a professional-looking result without needing any special equipment or supplies – but it is not only very time-consuming, it also requires a lot of patience!

Pros: Looks very professional and beautiful, perfect for precious quilts

Cons: It's very time-consuming, and requires love for hand sewing

Binding Method 3: Hand Stitching, Front and Backside

Prepare your binding

Before you start sewing, prepare your binding strips by cutting them to the right width, which depends on the method you choose to sew. Calculate how many strips you need to go all around your project.

For Method 1, cut your strips 2 1/4" wide

For Method 2 and 3, your strips should be 2" wide

Connect your single binding strips to one long strip by connecting them with a bias seam as the video tutorial shows you. Then fold that long strip in half lengthwise and press.

Also, it might be a good idea to baste your quilt with 1/8" all around, so that all the layers are flatly connected, and then trim off any excess batting and backing.

Sewing on the binding strips

Before you start with sewing on the binding strip, first place it provisionally on your quilt and check the corners. In any case, you should avoid that a joining seam appears exactly at the corner. It would create too much bulk.

Once your binding strip is provisionally right in place and pinned on with a couple of wonder clips, you start sewing on the strip with 1/4" seam. Leave the first 10" or a handbreadth open and loose, you will need that for connecting start and end later.

Sewing the corners

The sewing of corners is the most difficult part of binding a quilt. It can be done with patience and practice, and I show you how to do that in our video in detail, step-by-step.

Connecting the start and end of the binding strip

Once you come close to the end of the binding strip, stop about 10" before the starting point of your seam. Trim back that end to about 10". You will now have two loose parts to still connect and the video tutorial shows you step-by-step how to do that.

Attach the binding to the other side of the quilt, using one of the 3 different methods.

Next, you just have to press the binding well and fold it over to the back. Using one of the methods introduced in section one, you can now sew your binding to the backside.
When I choose a machine sewing method, I prefer to prepare my corners by hand before I even go to the sewing machine. Because if the corners are already nicely and correctly formed, I can then sew continuously without interruption at the machine, either stitch in the ditch or decorative stitching.

A professional binding makes all the difference.

It’s the finishing touch. The last thing you do. The most important part of your quilt. A professional binding makes all the difference.

And remember, the most important thing is to have fun! You can always start with a simple binding like we’ve outlined here and build from there. You can use different fabrics inside the binding, using up your scraps. You can play with various decorative stitches. Whatever you choose, just make sure it looks good on your quilt!


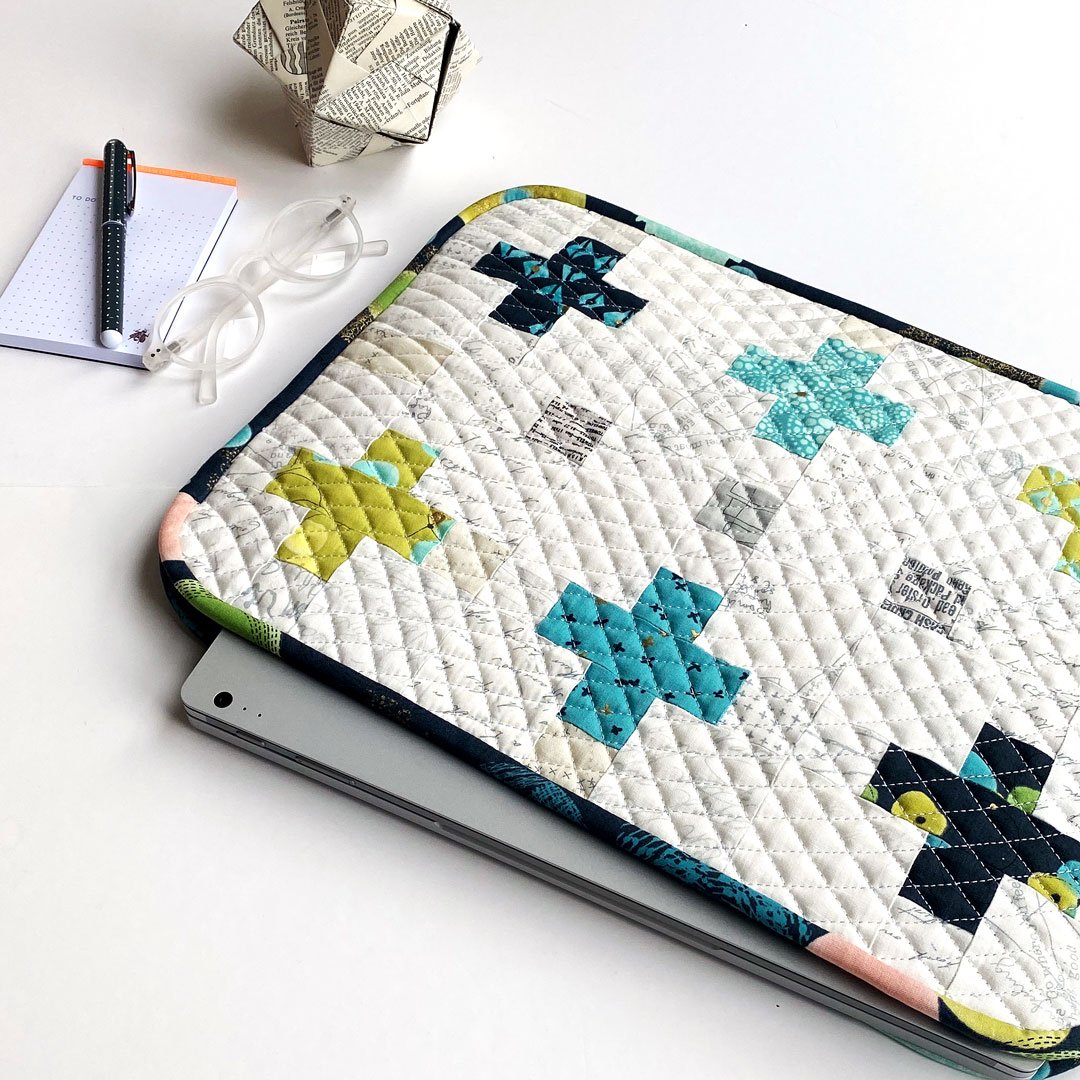
Zen Chic 2022 Pluses Quilt Along - Week 6 Finishing the Pluses Quilt

We are now on week 6 of our Pluses Quilt Along and there are a lot of great projects to see on Instagram and on Facebook.

This week our task is to finish the top, quilt it and bind it (this is where our binding tutorial comes in handy 😃)

I really enjoy all the variations I can see from the Pluses QAL using the hashtag #plusesqal

Sieh dir diesen Beitrag auf Instagram an

Ein Beitrag geteilt von Anne (@batiksbythebay)

Sieh dir diesen Beitrag auf Instagram an

Ein Beitrag geteilt von Henze Albers (@henzealbers)

Sieh dir diesen Beitrag auf Instagram an

Ein Beitrag geteilt von Inghelhoe (@inghelhoe)

Sieh dir diesen Beitrag auf Instagram an

Ein von @mamabearquilts geteilter Beitrag

Look how beautiful all these variations come together!


Prizes to Win!

Last week, we had a digital subscription of Simply Modern sponsored by Quiltmania for one lucky person who shared their progress on the Pluses Quilt on Instagram or Facebook.

Sponsored by StitchedInColor

This week our sponsor is my favorite longarm quilter, Rachel Hauser of Stitchedincolor. She is generously giving away three of her popular patterns. So we can have three individual winners and if your fingers are itching to start something new after our QAL, this might be your chance!

Just show off your progress this week! Upload your photographs on Instagram or Facebook with the hashtag #plusesqal.

Join the free Quilt Along too

If you wanna win this awesome gift certificate, come join us in the Pluses Quilt Along. It's not too late to jump in. Besides, in every newsletter we share a list with links to the former newsletters, so you can always catch up.

What are you waiting for?! You don’t wanna miss out!

Wanna read more before you sign up? Check out the page on this QAL here.

 
Other ideas you may like
Strata front.jpg
Beginner, Fat Quarter, Lap Size, Simple Piecing
Strata
Beginner, Fat Quarter, Lap Size, Simple Piecing
$12.95

Featuring SIMPLY COZY fabrics available through Moda Fabrics. Finished size: 63" x 63". This contemporary throw blanket catches everyone's eye.


This item is a digital product and no physical product will be sent. Upon checkout, you will be emailed a link to download, save, and print your pattern. Instant download items are not able to be refunded, exchanged, or canceled. 

Beginner, Fat Quarter, Lap Size, Simple Piecing
Lotus front.jpg
Fat Quarter, Intermediate
Lotus
Fat Quarter, Intermediate
$12.95

Featuring my BLUISH fabrics exclusively offered by Moda Fabrics. Completed dimensions: 61" x 61". Drawing inspiration from the elegant petals of a flower, this warm and inviting quilt showcases gentle curves and a delightful combination of BLUISH prints and subtle low volumes, creating a serene atmosphere. Check out our step-by-step YouTube tutorial on how to sew the blocks! ➡️ Tutorial: https://youtu.be/JwSvZZTZCHU


To gain confidence in sewing curved seams, we enthusiastically suggest enrolling in our online course, CURVED SEAMS INCREDIBLY EASY


This item is a digital product and no physical product will be sent. Upon checkout, you will be emailed a link to download, save, and print your pattern. Instant download items are not able to be refunded, exchanged, or canceled. 

Fat Quarter, Intermediate
Dance with me front.jpg
Fat Quarter, Intermediate
Dance With Me
Fat Quarter, Intermediate
$12.95

Featuring my BLUISH fabrics exclusively offered by Moda Fabrics. This sensational quilt, measuring 85" x 85", is here to make you groove! Prepare for a delightful and funky experience with sassy little circles inspired by the iconic vinyl records. Put on your favorite music, let the rhythm guide your stitches, and get ready to spin right round! This quilt is the perfect companion for music lovers who want to infuse their passion into their quilting adventures. Let the beats inspire you as you create a masterpiece that radiates joy and creativity.


This item is a digital product and no physical product will be sent. Upon checkout, you will be emailed a link to download, save, and print your pattern. Instant download items are not able to be refunded, exchanged, or canceled. 

Fat Quarter, Intermediate
On the Plus Side front.jpg
Beginner, Fat Quarter
On The Plus Side
Beginner, Fat Quarter
$11.95

Featuring the collection FILIGREE available through Moda Fabrics Finished size: 81" x 81". STRIKINGLY CONTRASTING PLUS SIGNS IN A WIDE VARIETY OF TEXTURES MAKE THIS BED QUILT A YOUTHFUL EYE-CATCHER.

This item is a digital product and no physical product will be sent. Upon checkout, you will be emailed a link to download, save, and print your pattern. Instant download items are not eligible for refunds, exchanges, or cancellations.  

Beginner, Fat Quarter
In free pattern, Zen Chic inspiration, Pluses QAL, Tutorials Tags Zen Chic, Tutorial, Binding
← Learn Patchwork The Easy Way And Get Your Fingers Itching With This Skillshare ClassDIY round pincushion and Pluses Quilt Along Week 5 →
Follow my blog with Bloglovin
free-ikat-quilt-pattern-by-zen-chic.jpg
  • Artist Quilts
  • Bauhaus QAL
  • Blockheads 2018
  • Blockheads 2020
  • Books
  • Classes
  • Dots On Point QAL
  • Fragment QAL
  • Free resource library
  • Frisky
  • Lookbook
  • Online Class
  • Pluses QAL
  • Quilts
  • Sewcialites
  • Spring in Paris QAL
  • Those Trees QAL
  • Tutorials
  • Zen Chic BOM 2018
  • Zen Chic inspiration
  • Zen Chic patterns
  • bags
  • fabric collections
  • free pattern
NEWSLETTER
Die Top 15 der Handarbeit Blogs
top-15-modern-quilt-blogs.png
Featured
Artist Quilts & New Patterns – Summer Sale at Zen Chic
Rome, Rest & Reflection – Why I Went Quiet for 4 Weeks
DIY Quilting Design Wall Guide: 7 Smart Solutions for Every Space
Egg-citing Easter News: Tips to Spark Joy in Every Stitch
Fragment QAL Finale: Celebrating Our Amazing Quilting Community

ZEN CHIC, Schlingweg 17, 33824 Werther, Germany