
Ho-Ho-Hold Up—Christmas is Sneaking Up on Us!
Can you believe Christmas is practically around the corner? One minute you're sipping iced coffee in the sunshine, and the next—bam!—it's November and you're wondering where the year went. Time to start planning for the holidays, friends!
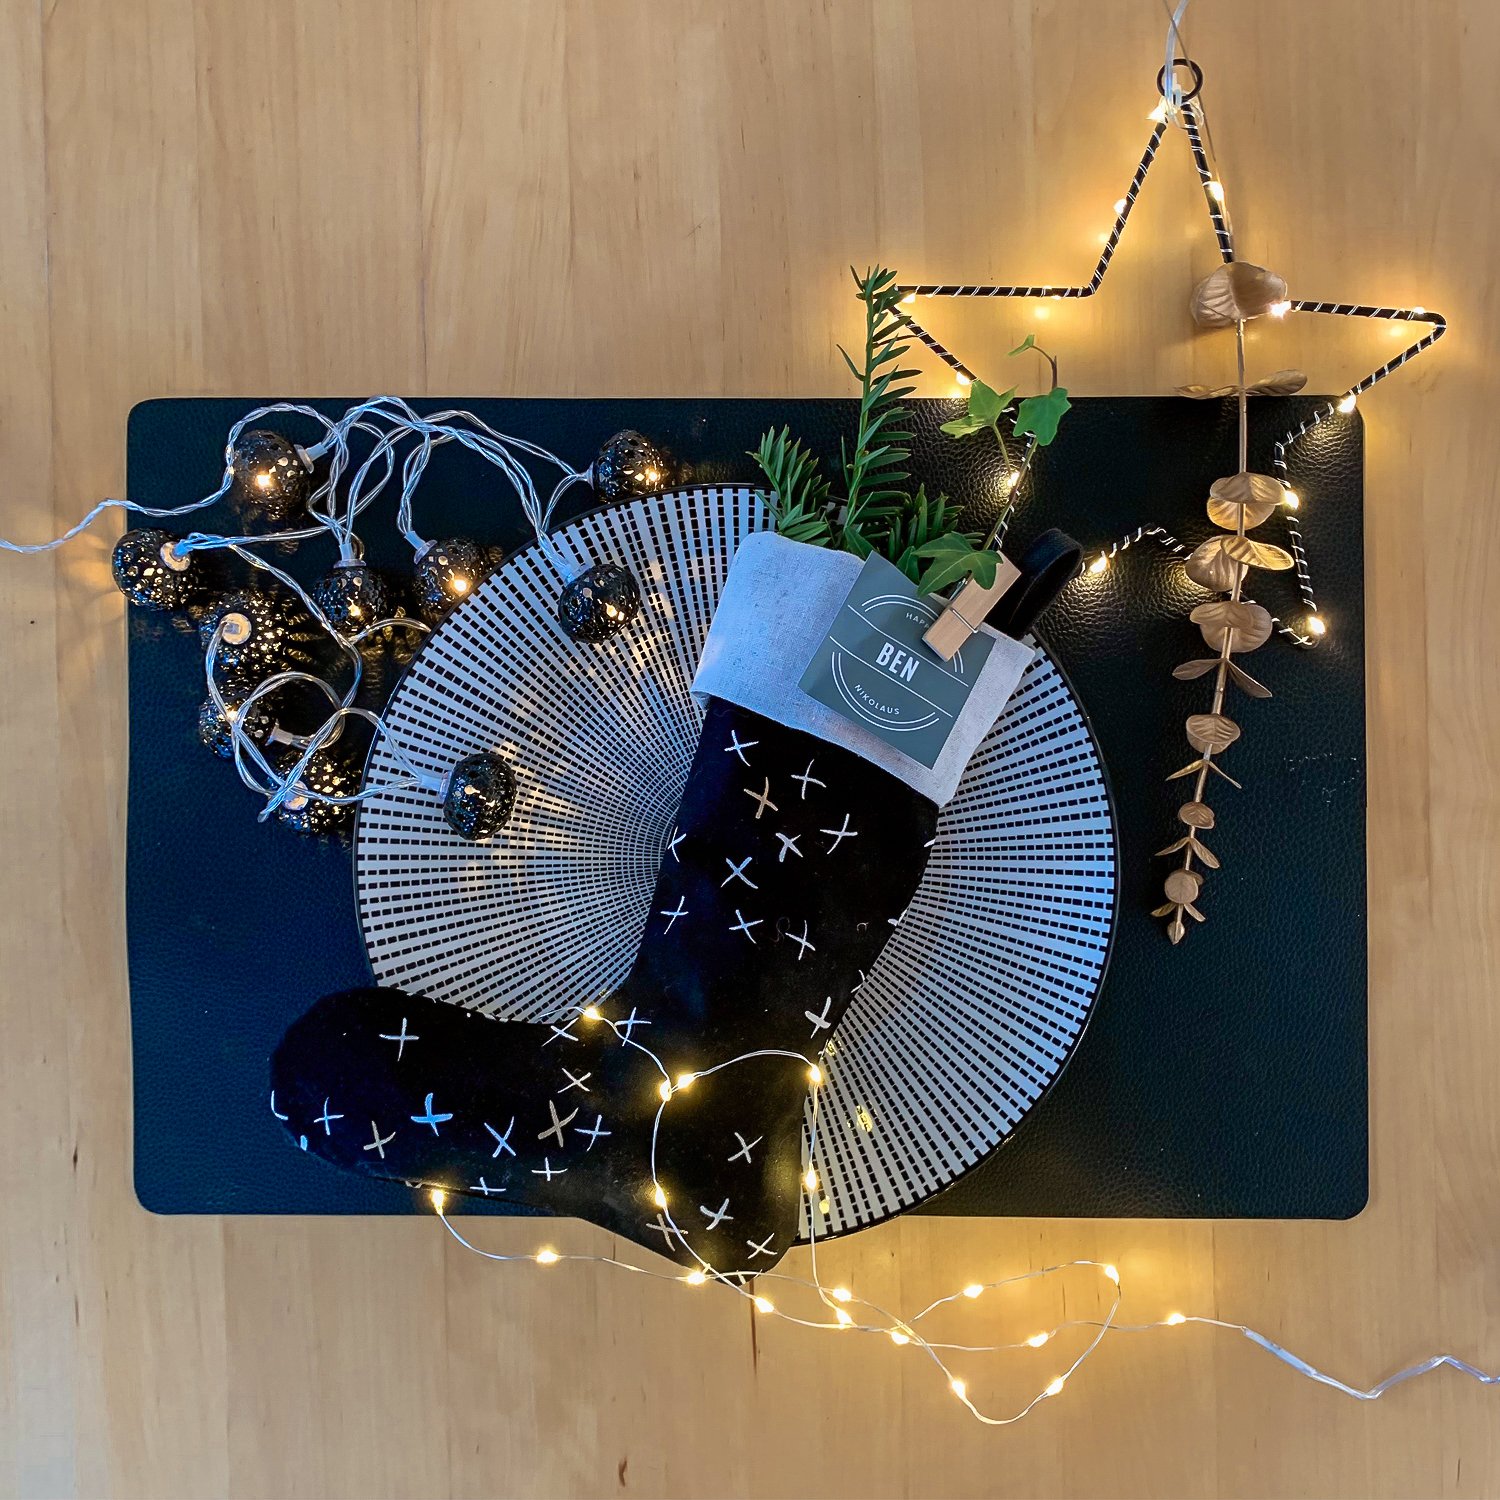
When I think about Christmas, my mind goes straight to cozy gatherings with family and friends, thoughtful gifts, and a dining table that's dressed to impress. There's something magical about a beautifully decorated table that makes my quilter's heart sing—especially when it includes those special handmade touches that only we sewists can pull off. 😊
The Great Quest for the Perfect Christmas Table Decor
So naturally, I'm always on the hunt for easy-but-adorable decorations to jazz up our Christmas table. But let's be real—finding something non-traditional for a simple placeholder can feel like searching for a needle in a haystack (pun absolutely intended). We usually default to the classic folded name card or a napkin wrapped with some pine sprigs and holly berries. Nice, but... yawn.
Let's shake things up! How about crafting a few mini Christmas Stockings to place on your plates? I've got a free tutorial complete with a printable template just for you. And here's the best part: it's super easy and totally doable in a weekend—or even during a cozy evening with your favorite show on in the background.
Ready? Let's dive in...
Print Your Mini Stocking Template (No Fumbling Required!)
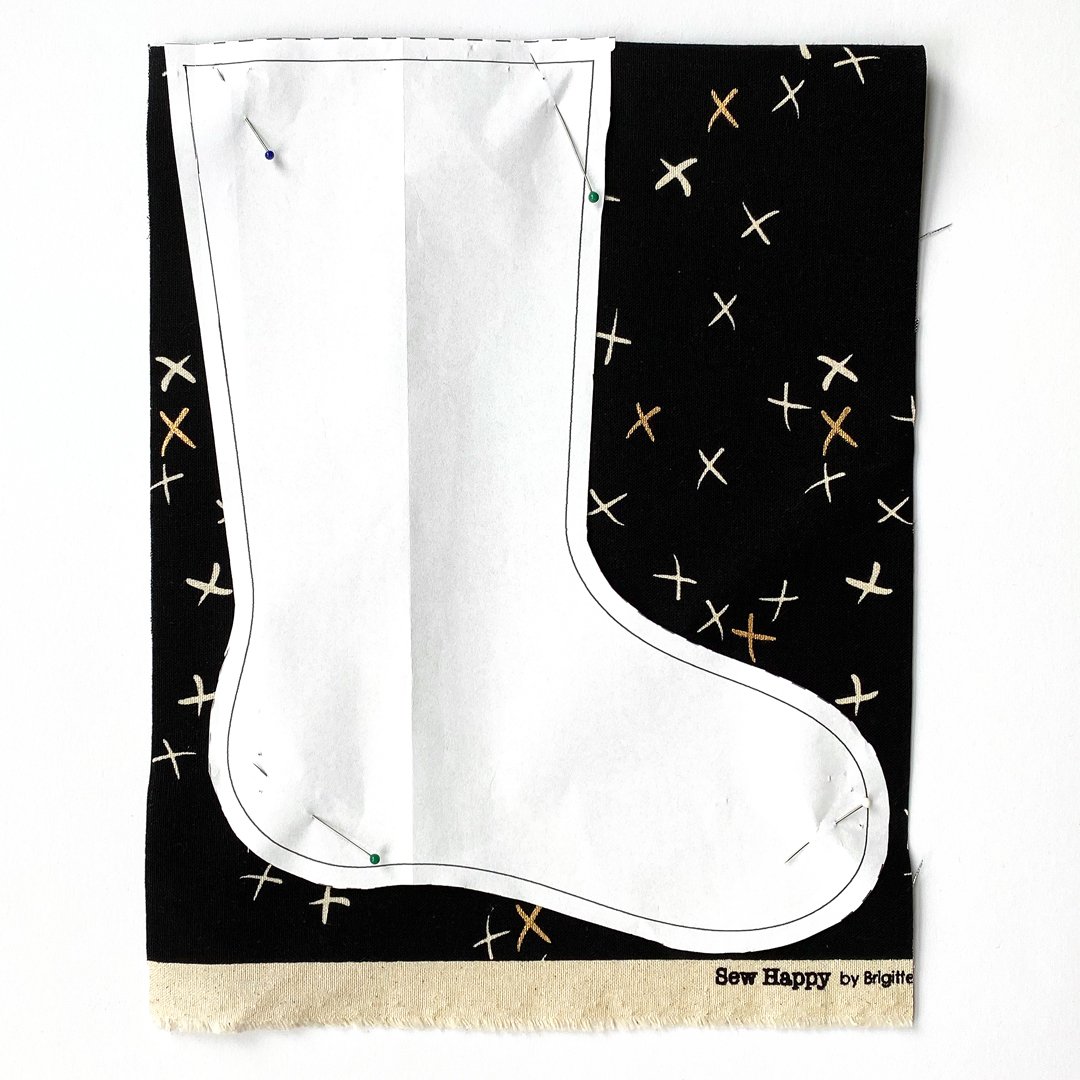
Alright, let's get this party started! Head over to our free resource library and grab the printable template for one adorable little stocking. It's sized for US Letter paper, so make sure you print at actual size or 100%—no shrinking or stretching allowed, or you'll end up with wonky stockings (and nobody wants that!).
Now, these cuties are on the petite side—perfect for place settings. But if you're thinking bigger (literally), like "I need these hanging on my mantel," go ahead and print at poster size around 150%. Sure, your seam allowance will change a smidge, but honestly? It won't make a lick of difference to the final result. You do you! 😊
The instructions given here are for the original size of the Christmas Stocking.
Don't have the password for the free resource library yet? Click here and it'll land in your inbox faster than you can say "holiday sewing spree." Trust me, this library is absolutely bursting with patterns and templates—it's like a quilter's treasure chest!
Oh, and while you're there? Check out our free Christmas table runner pattern. It's a quick little project that'll have your table looking festive before you can say "pass the eggnog." You're welcome! 🎄

Materials needed for the Christmas Stocking
Besides your preferred sewing tools, like scissors, pins, and your sewing machine,
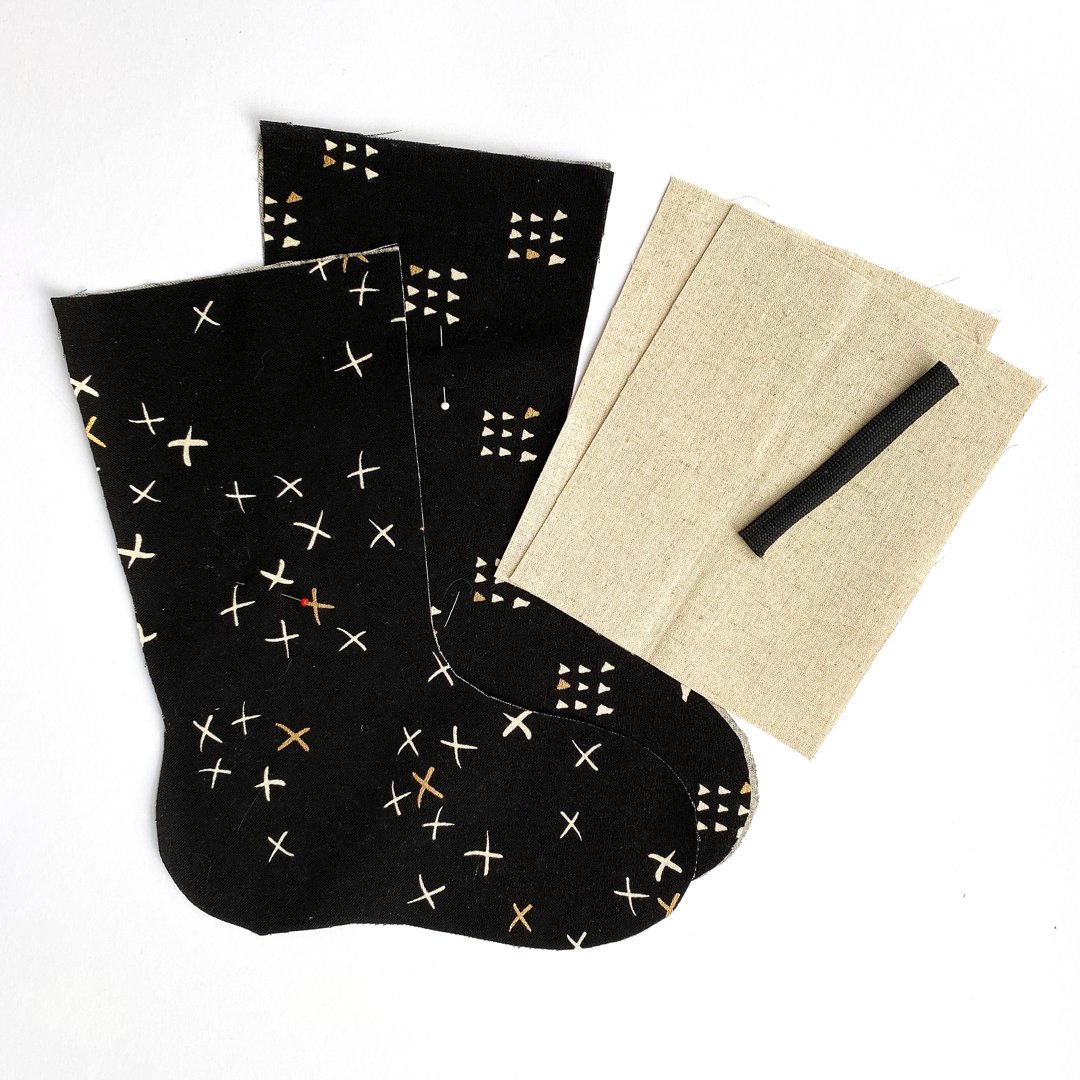
You’ll need 2 Fat Eights in different designs if you want a different lining than the outside of the Stocking. If you like to use the same fabric for the lining you can use 1 Fat Quarter or a quarter yard.
For the cuff of the Stocking, you’ll need 5 ¼ ” x 6 ½ “ of neutral linen.
When you use a sturdy canvas like the one of the Sew Happy collection, you don’t need any interfacing or batting. However, if you’re making this with simple quilting cotton, you can add interface or batting to the pattern pieces.
A piece of ribbon for the loop, 4” long
The template for the Stocking from the free resource library
Cutting the pattern pieces
Fold your Fat Eights creating the fold on the shorter end.
Sewing instructions
Fold your ribbon in half and sew it to the shorter side of one cuf piece, about ¼ “ away from the longer edge

Sew together 1 outer piece and 1 lining piece with the cuff in the middle, using a ¼” seam allowance, making sure you use the right pieces (pointing both the toes of the outer piece and the lining piece toward you) The shorter edges of the cuff are matching the top edges of the Stocking pieces.

Press the seams toward the Stocking pieces.
Do the same for the other pieces so you’ll get a mirrored version of the first pieced unit. The ribbon is placed with the lining part of the Stocking

Place the two pieced units right sides together and with a ¼ “ seam allowance, sew all around while leaving an opening of 5” in the lining part.
I trimmed the round parts of the pattern with my pair of pinking shears scissors to prevent unraveling of the fabric. Also when turning the Stocking, the seam will behave more smoothly. But that is optional.

Turn the complete piece and close the gap with hand or machine stitching. Give it a good press.

Finally, tuck the lining into the exterior part, now the wrong sides of the fabrics are facing. You can use a wooden spoon to tuck the lining in and get the toes together nicely.

Give it a good press again and fold the cuff down as a decorative part of the Stocking. That way the ribbon reveals itself and you can hang your Christmas Stocking.

More Than Just Place Settings—Think Gift-Giving Magic!
Sure, these mini Christmas Stockings look adorable perched on your holiday plates or dangling from the mantel. But let's not stop there, friends! These little beauties make absolutely delightful gifts too. Pop in a handwritten note, some fancy chocolate, or a cute notion, and you've got yourself a thoughtful present that'll make someone's day.

Feeling ambitious? Go ahead and whip up 24 of these cuties and create your very own handmade advent calendar! There's plenty of room inside for small treats that'll bring smiles to your kids or grandkids every single day leading up to Christmas. (And let's be honest—who says adults can't enjoy one too? 😉) Need inspiration for what to tuck inside? Holly's got you covered with a massive list of stocking stuffer ideas that'll save your bacon.
Why wait? Let the Christmas fun begin today!
Happy sewing, my friend!